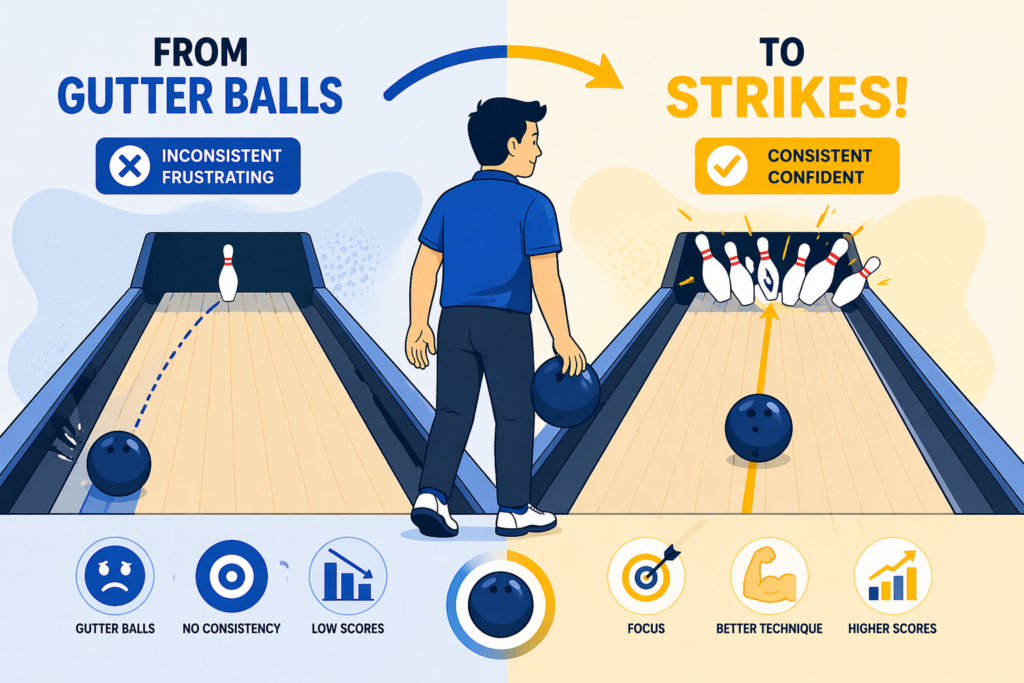
Bowling is one of those sports that looks almost suspiciously simple from a distance. You pick up the ball, walk a few steps, swing your arm, and send it down the lane. Then you actually try it. The ball veers into the gutter, your arm feels out of sync with your feet, and you start wondering how anyone manages to string three strikes together, let alone bowl 200 or more.
The encouraging part is this: bowling is incredibly “learnable.” You don’t need years of athletic background, special flexibility, or brute strength. Most beginners who commit to a bit of focused practice can jump from inconsistent, frustrating scores to steady, respectable games surprisingly quickly.
This guide is written for new and casual bowlers who are ready to stop guessing and start understanding. You’ll learn how the lane and scoring actually work, how to choose a ball that helps instead of hurts, how to walk and swing in a way your body can repeat, how to aim with intent, and how to build simple spare systems that raise your average fast.
Think of it as a full walkthrough—from your very first ball choice all the way to joining a league—minus the jargon and intimidation.
Understanding the Basics of Bowling
Before you worry about throwing a big hook or buying high-end equipment, it helps to understand what the game is actually asking you to do. Once you see how scoring, lane layout, and terminology fit together, the rest of the techniques make much more sense.
How bowling scoring really works (without a headache)
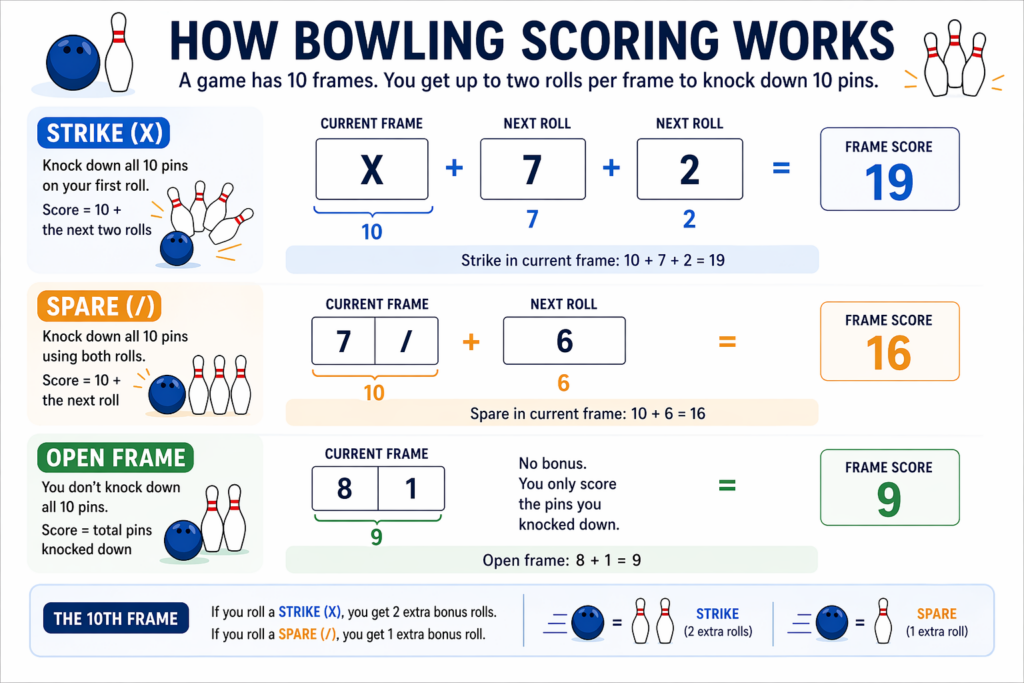
A bowling game is made up of ten frames. In each frame, you get up to two rolls to knock down ten pins. What confuses people isn’t the basic math but the bonus system for strikes and spares.
Here’s the core logic:
Strike (X): Knock down all ten pins on your first ball in a frame. That frame’s score is 10 plus the total pins from your next two rolls. Think of it as your strike “borrowing” the next couple of shots to complete its value.
Spare (/): Use both balls in a frame to knock down all ten pins. That frame’s score is 10 plus the pins from your next single roll.
Open frame: Leave at least one pin standing after your two rolls. You only get credit for the pins you knocked down in that frame. No bonus carries over.
The tenth frame is a little different. If you roll a strike, you earn two extra bonus balls in that same frame. If you roll a spare, you earn one extra bonus ball. This is how the math allows a 300 game: it’s essentially 12 strikes in a row (10 frames plus the two extra rolls in the tenth).
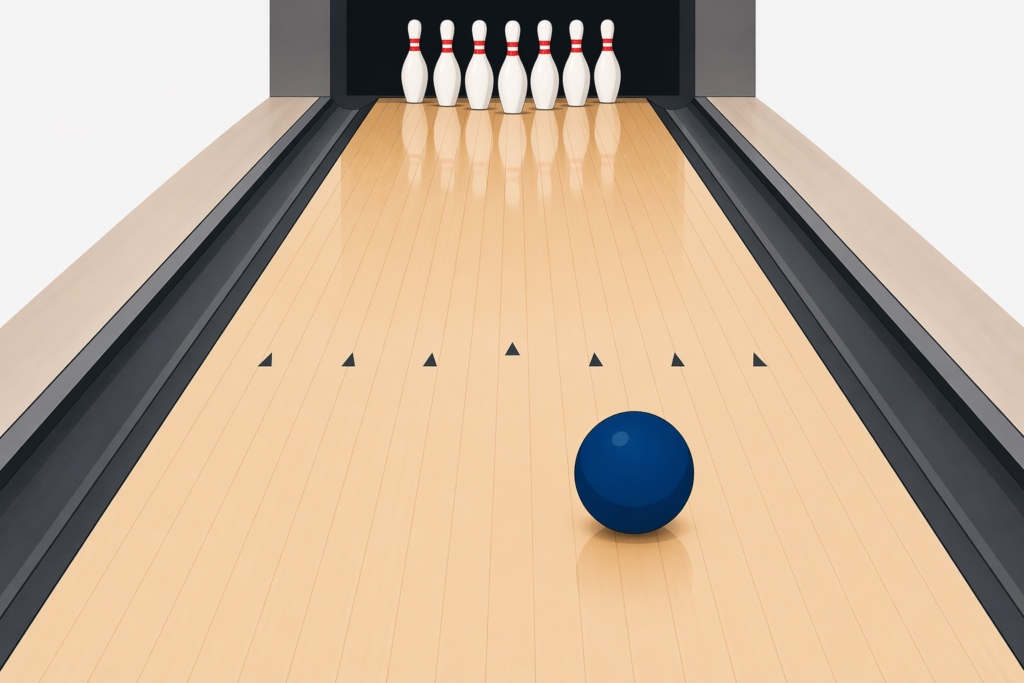
Lane layout, markings, and core terminology
Once you step onto the approach, you’re standing in a quiet little system of reference points that most casual players ignore. Learning what they mean gives you built-in aiming tools before you ever talk about a hook.
Approach: The wooden or synthetic area you walk on before releasing the ball. This is where your footwork, rhythm, and balance live.
Foul line: The line at the start of the lane. Cross it during your delivery and the roll doesn’t count, even if you throw a perfect strike. Also, beyond that line the floor is oiled and extremely slippery, so it’s a safety boundary too.
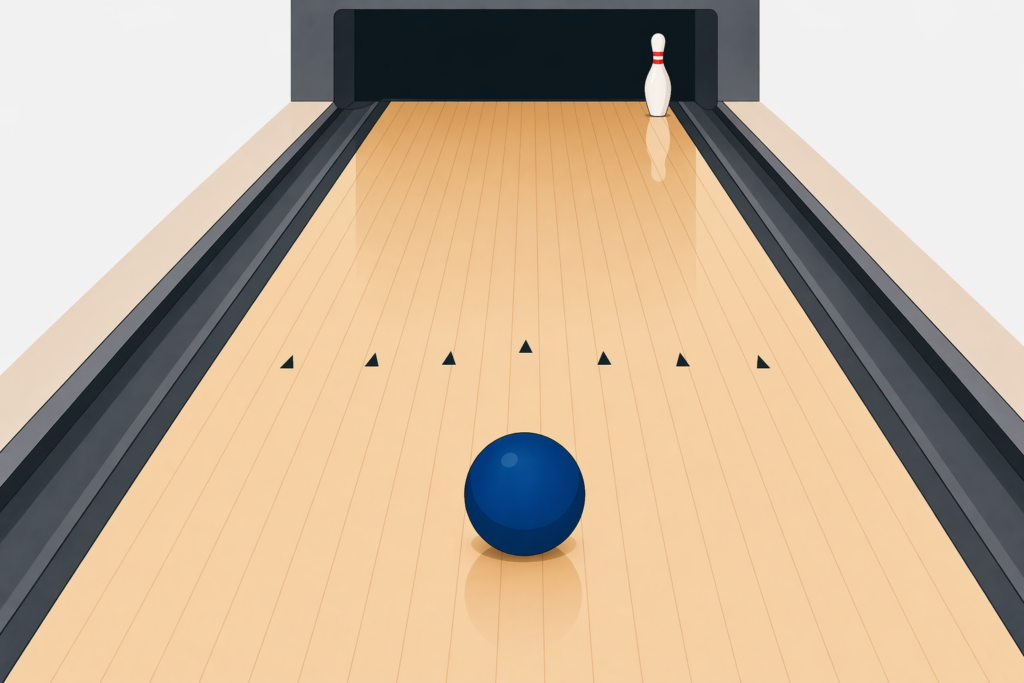
Dots and arrows: On the approach you’ll see sets of dots that help you position your feet. On the lane, about 15 feet past the foul line, you’ll see a row of arrows. These arrows (and sometimes the small dots just past the foul line) are your main targeting tools. They let you aim at something much closer than the pins.
Boards: The lane is divided side-to-side into 39 narrow “boards.” You never need to count all of them, but they give you a way to think in small adjustments. Moving your feet or target just one or two boards can be enough to fix a miss.
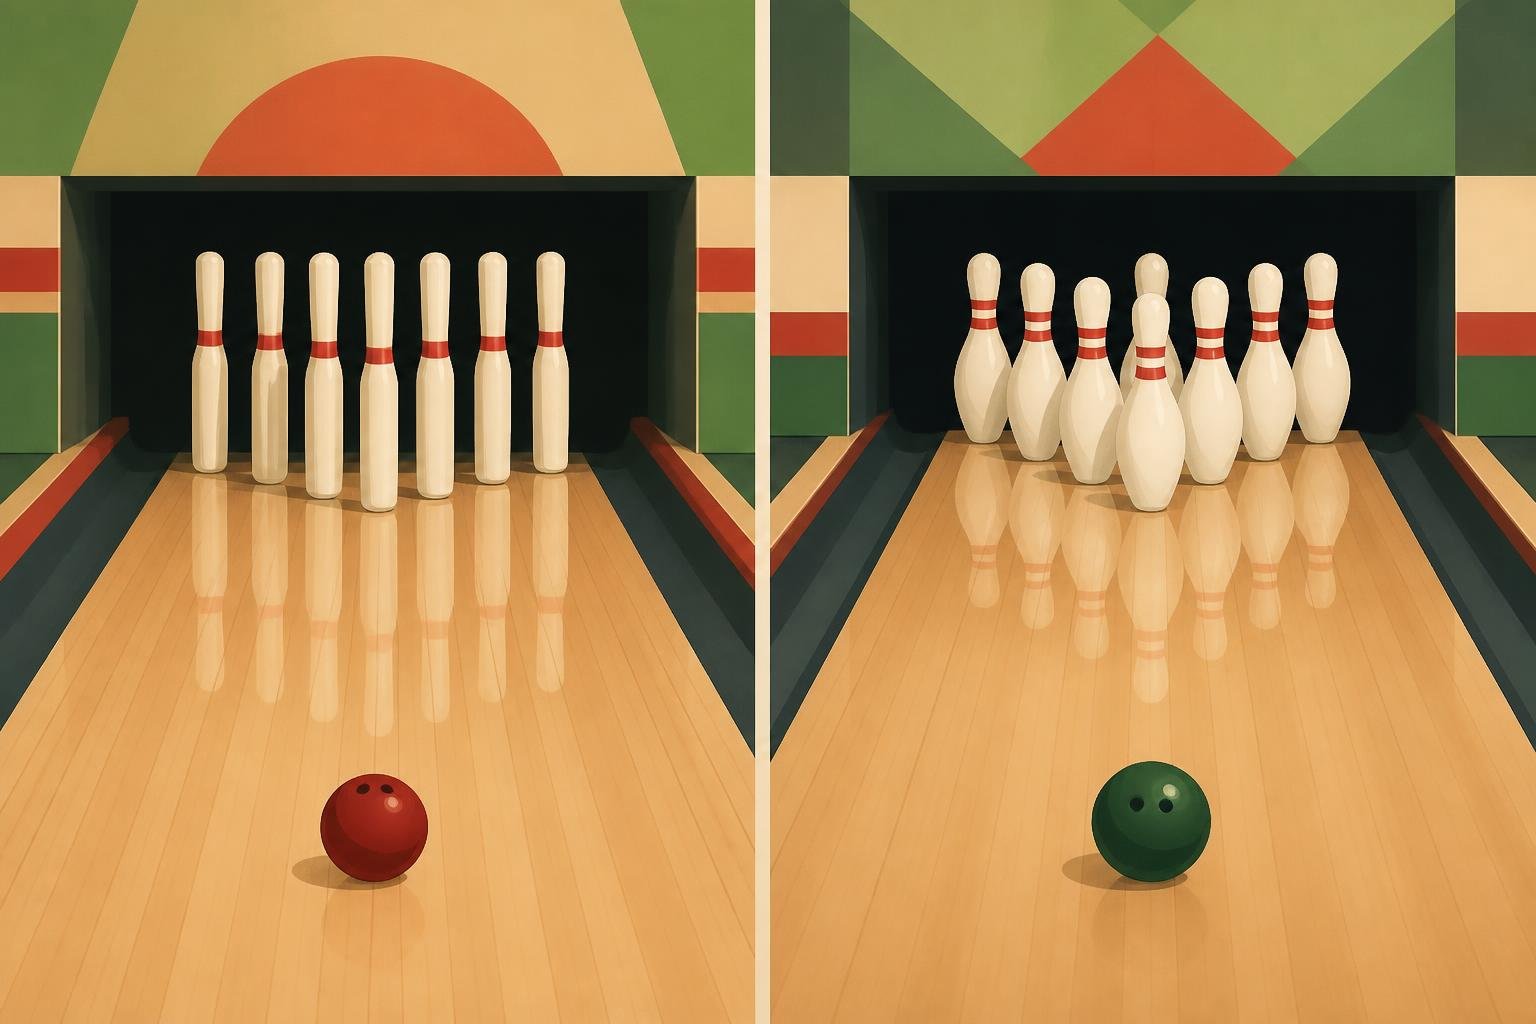
Pins and pocket: Pins are numbered from front to back and left to right. The front “head pin” is the 1-pin. Behind it are rows of two (2 and 3), three (4, 5, 6), and four (7, 8, 9, 10). The “pocket” is the sweet spot: for right-handers, between the 1 and 3 pins; for left-handers, between the 1 and 2. Most high-percentage strikes come from hitting this area with a bit of angle.
What your local bowling center actually provides
If you’re just starting out, everything you need to bowl an enjoyable game is already in the building.
House balls: These are the balls on the racks sorted by weight. The holes are drilled in generic sizes to fit as many different hand shapes as possible. Convenient, but rarely “just right.”
Rental shoes: Bowling shoes have specialized soles that let you slide smoothly on the approach. Rental shoes get the job done, but they’ve been worn by a lot of people and often have uneven wear, which can change how they slide.
Pro shop: Many centers have a pro shop on-site, usually tucked near an entrance. This is where you can talk to someone about getting your own ball, having it custom drilled, and exploring accessories like a wrist support or personal shoes. A good bowling pro shop operator can be a game-changer because they see hundreds of bowlers and understand patterns beginners don’t see yet.
Setting realistic early goals
New bowlers often secretly expect immediate strikes. When that doesn’t happen, it’s easy to feel like you’re just not “naturally good” at bowling. The reality is that your first goals shouldn’t be “strike every time.” They should be about control and consistency.
For your first few practice sessions, focus on:
Keeping the ball on the lane instead of the gutter.
Sending the ball over roughly the same general part of the lane each time.
Reducing open frames by picking up simple spares (single pins and easy clusters).
If you’re completely new, reaching a stable average around 100–120 is a very reasonable early milestone. Once you’re there, tightening your timing, release, and spare shooting can move you anywhere from the 140–160 range and beyond faster than you might expect to improve your bowling average.
Choosing the Right Bowling Ball
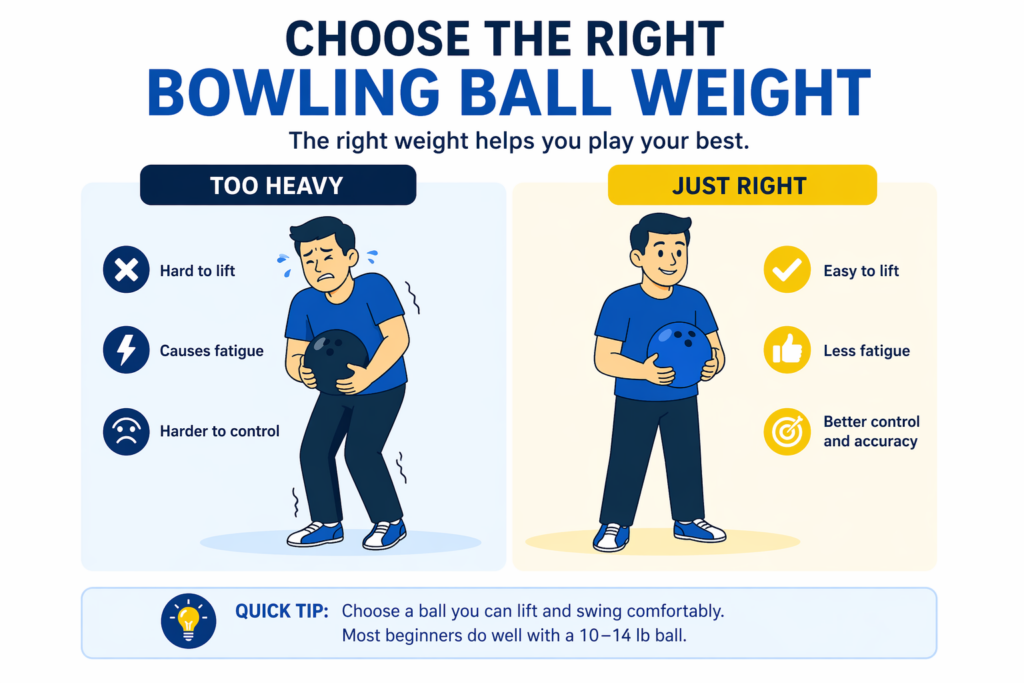
The bowling ball is your only piece of equipment that actually touches the lane and the pins, so it matters more than most beginners realize. A ball that’s too heavy, awkwardly drilled, or just ill-fitting will quietly sabotage your progress no matter how carefully you work on form.
Ball weight: guidelines and honest self-checks
You’ll often hear the 10% rule: choose a ball that’s about 10% of your body weight, up to a maximum of 16 pounds. So if you weigh 150 pounds, 14 or 15 pounds might sound about right.
In practice, what matters most is whether you can swing the ball naturally for multiple games without pain or strain. A weight that looks “correct” on paper but makes your shoulder ache is not the right ball for you.
Your ball is probably too heavy if:
You feel your shoulder or wrist straining even before you start swinging.
You have to muscle the ball through the swing instead of letting it feel like a comfortable pendulum.
You feel fatigued or sore after just one or two games.
On the other hand, a ball that’s too light often causes its own set of problems:
The ball feels flimsy, and you over-accelerate your arm to “make up” for it.
You tend to loft it onto the lane instead of rolling it smoothly.
Your timing gets erratic because it’s too easy to throw hard without control.
For most adult beginners, 12–15 pounds is a realistic range. If you have shoulder, elbow, or wrist history, feel free to err lighter. Your goal isn’t to impress anyone with the number stamped on the ball—it’s to find a weight you can swing smoothly, game after game.
Fit, grip style, and why your hand matters more than you think
Even if the weight is perfect, a poor fit in the thumb and finger holes can cause blisters, pain, drops, or sticky releases. This is one big reason so many beginners “drop” the ball early or fling it halfway down the lane without meaning to.
Conventional grip: For most beginners, this is the best starting point. Your thumb goes all the way into the thumb hole; your middle and ring fingers go into their holes up to the second knuckle. It’s stable, secure, and forgiving when your technique isn’t dialed in yet.
Fingertip grip: This is what many experienced and competitive bowlers use. Your thumb is still fully inserted, but your middle and ring fingers only go in to the first knuckle. This allows for more revolutions and hook potential—but it assumes a ball drilled specifically to your hand and stronger finger control. It’s usually something to progress into rather than start with.
Signs that the grip or fit is off:
You feel like you have to squeeze hard to hold onto the ball.
Your thumb doesn’t exit cleanly; the ball “hangs” and then leaves late.
You’re developing calluses, soreness, or blisters around your thumb or finger joints.
A properly fit ball feels almost “weightless” during the swing because you’re not fighting to control it. If you’re curious about how professional fitting works, our guide on choosing the right bowling ball will guide you in the right direction.
House balls vs. buying your own ball
House balls are fine for social nights and early experimentation. They let you try different weights without committing. But they’re still generic tools. Once you’ve bowled a handful of sessions and care about your scores, there’s a strong case for getting your own ball.
Owning your own ball starts to make sense when:
You’re bowling at least a couple of times per month.
You find yourself hunting for “that one house ball” every visit.
You’re interested in developing a consistent release and maybe a gentle hook.
An entry-level reactive resin ball, drilled to your hand, is more affordable than many people assume and can easily last years with basic care. More importantly, it reacts to lane oil in a predictable way, which makes it much easier to learn how your shots behave. If you’re not sure where to start, pro shop operators can often recommend beginner-friendly balls specifically designed for controllable hook and predictable motion.
Other beginner-friendly gear worth considering
You don’t need a huge gear bag on day one. A few targeted upgrades go a long way.
Bowling shoes: This is typically the first purchase that starts paying you back. Your own shoes will slide the same way every session. That consistency helps your timing, balance, and overall confidence on the approach.
Wrist support: If your wrist tends to collapse or twist during delivery, a simple support can help you keep a stronger, more neutral position. It’s not mandatory early on, but it becomes more useful once you start exploring hook releases.
Tape and grip products: Thumb and finger tape can fine-tune the feel of your fit, especially as your hand changes slightly session to session. Rosin bags or grip sacks can help if your hand gets sweaty.
Most of this can wait until you’ve bowled enough to know that you enjoy the game and want to keep improving. But keeping them in mind helps you see what’s possible beyond rental gear.
Setting Up Your Bowling Stance and Start Position
Everything that happens on the lane begins with how you stand. An efficient bowling stance isn’t stiff or complicated. It’s more like the balanced position you’d use to shoot a free throw or catch a ball: stable, relaxed, and ready to move.
Finding your natural starting distance
You don’t need to guess how far back to start on the approach. Here’s a simple method:
Walk up to the foul line without a ball. Place the toes of your sliding foot (left foot for right-handers, right foot for left-handers) just behind the line. Turn around so your back faces the pins.
Now, walk back four casual steps at a comfortable pace—no stretching or shuffling. Where you stop is a good starting point for a four-step approach. If you plan to use a five-step approach, add one small step before those four.
Look down at the dots under your feet. Those dots will become your landmarks. Later on, when you adjust left or right, you’ll always know exactly where you started.
Foot placement, alignment, and “train tracks”
For a straight ball as a right-hander, a simple starting setup is to place your left foot near the center dot, facing the pins, with your right foot slightly behind and a bit to the right. Left-handers reverse this.
The key isn’t some magical exact spot—it’s alignment. Picture two train tracks going straight down the lane. One track is your feet and body. The other is the path your ball will travel. You want those tracks to be parallel.
If your feet face one way, your hips another, and your shoulders twist somewhere in between, your swing tends to follow the twist. That’s when you see a lot of shots pulled across the body or shoved out wide.
Balanced, athletic posture (without feeling robotic)
In your stance, let your body settle into a natural position:
Knees slightly bent—not locked, not deep.
Upper body leaning a bit forward from the hips, but not hunched.
Weight centered over the middle of your feet, not way back on your heels.
Your non-bowling hand resting gently on the side of the ball for support.
If you feel rigid or tense in your shoulders or jaw, step back for a second. Shake your arms out, exhale slowly, and reset. Tension at the start usually shows up later as jerky swings and rushed steps.
How to hold the ball comfortably at the start
Insert your fingers and thumb fully, then rotate your hand so that, as a right-hander, your thumb is roughly at 10 o’clock in the stance (around 2 o’clock for left-handers). Your palm should be mostly under the ball, not behind it yet. Let your non-bowling hand carry some of the weight so your bowling arm doesn’t feel loaded before you even begin.
Hold the ball around mid-chest to waist height, close to your body. If you hold it up near your face, your pushaway tends to be awkward and high. If you hold it too low, you may end up swinging it like a heavy purse instead of letting it flow.
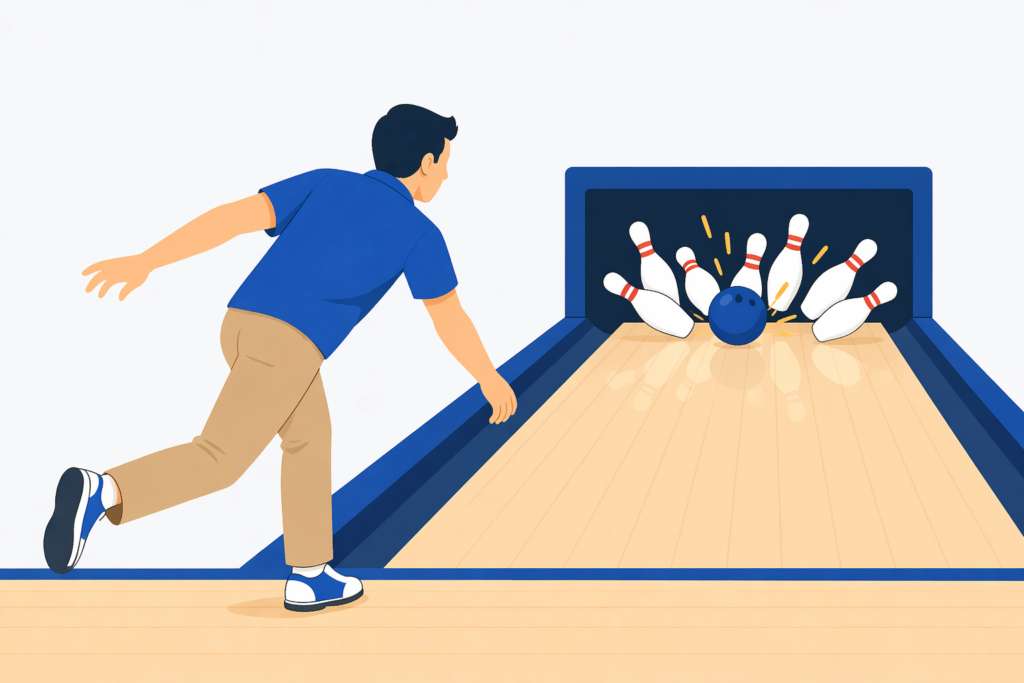
Mastering Your Bowling Approach
The approach is your walking pattern from stance to release. Most beginners try to fix individual pieces (like “snap your wrist” or “swing higher”) without realizing their feet and arm are out of sync. Once your footwork is consistent, your swing and release become much easier to refine.
Why smooth footwork beats raw power
The pins don’t reward the loudest ball; they reward the best angle and energy transfer. That comes from a repeatable approach, not a frantic sprint.
When every shot uses a different number of steps, different stride lengths, or a different pace, your brain is essentially solving a new puzzle every frame. A steady, repeatable approach lowers the “noise” in your motion so you can actually tell what changed when something goes wrong.
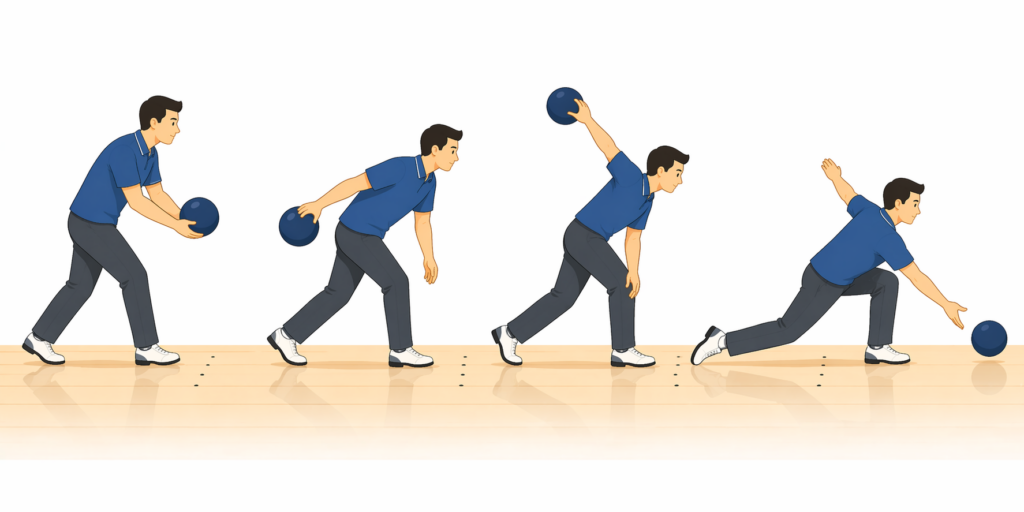
Breaking down the classic four-step approach
Assuming a right-handed bowler (left-handers mirror the steps):
Step one – pushaway with the right foot
From your stance, take your first step with your right foot as you gently push the ball away from your body and slightly downward. The word “gently” matters here. This isn’t a shove; it’s more like letting the ball fall forward into the start of its swing. Your non-bowling hand stays in contact for support.
Step two – left foot and falling backswing
As your left foot steps, let the ball drop into the backswing. Resist the urge to lift it with your shoulder. If you allow gravity to work, the motion will feel smoother and more controlled. Your elbow stays close to your side, your hand stays behind or slightly under the ball.
Step three – right foot, building momentum
With the third step, your right foot moves forward and your body naturally lowers a bit in preparation for the slide. The ball reaches the top of your backswing around this time. You don’t need a huge backswing—just a consistent one. Think “same height every time” more than “as high as possible.”
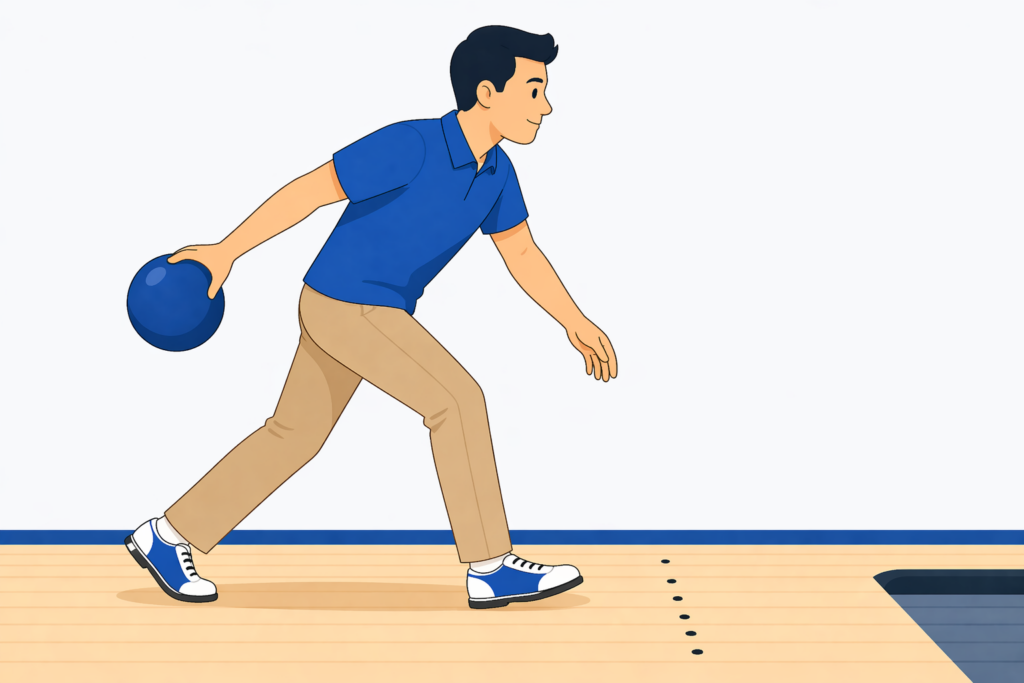
Step four – slide, release, and follow-through
As your left foot moves into the slide, the ball comes forward into the downswing. Your sliding leg bends, your trail leg slides behind and slightly to the side for balance, and your upper body stays stable. The ball should pass close to your ankle and leave your hand near the end of your slide, not in the middle of your walk. Your arm continues upward naturally into the follow-through.
Practicing this without a ball at first can help. Walk through the steps in slow motion, feeling where your arm would swing. Then add the ball back in and keep the same relaxed, deliberate rhythm for a good bowling approach technique.
When a five-step approach feels more natural
Some bowlers prefer a five-step approach because it gives them a small “pre-step” to ease into motion. For right-handers, this means:
A short initial step with the left foot (no pushaway yet), then right-left-right-slide, with the pushaway starting on the second step.
If you find the first step of the four-step approach feels rushed or heavy, a five-step pattern can spread your motion out and help you relax. There’s no universal rule about which is “better.” The important part is choosing one and letting your body get used to its rhythm.
Keeping timing in sync
In a functional approach, your feet and swing work together. One simple checkpoint: when your sliding foot finishes its slide at the foul line, the ball should be close to your ankle, ready to be released. If the ball has already passed your ankle and is halfway through the follow-through, you’re early. If it’s still behind you when you start the slide, you’re late.
Basic troubleshooting:
If the ball is late (behind you at the line), slow your feet slightly, or allow a more relaxed pushaway so the swing has time to develop.
If the ball is early (out in front of you too soon), your pushaway might be too forceful or too fast. Let the ball move out and down a little more gradually.
Approach mistakes beginners can fix quickly
Certain issues show up over and over for new bowlers:
Lunging steps: Long, reaching steps look dramatic but destroy balance. Think of walking normally instead of doing exaggerated strides.
Looking at your feet: Staring down at your steps throws off posture and swing path. Pick your target on the lane before you start and let your feet do their job.
Rushing the last step: Nervous energy tends to show up as a quick, choppy finish. Try quietly counting “one-two-three-slide” in a steady rhythm as you walk.
Building a Smooth Bowling Swing and Release
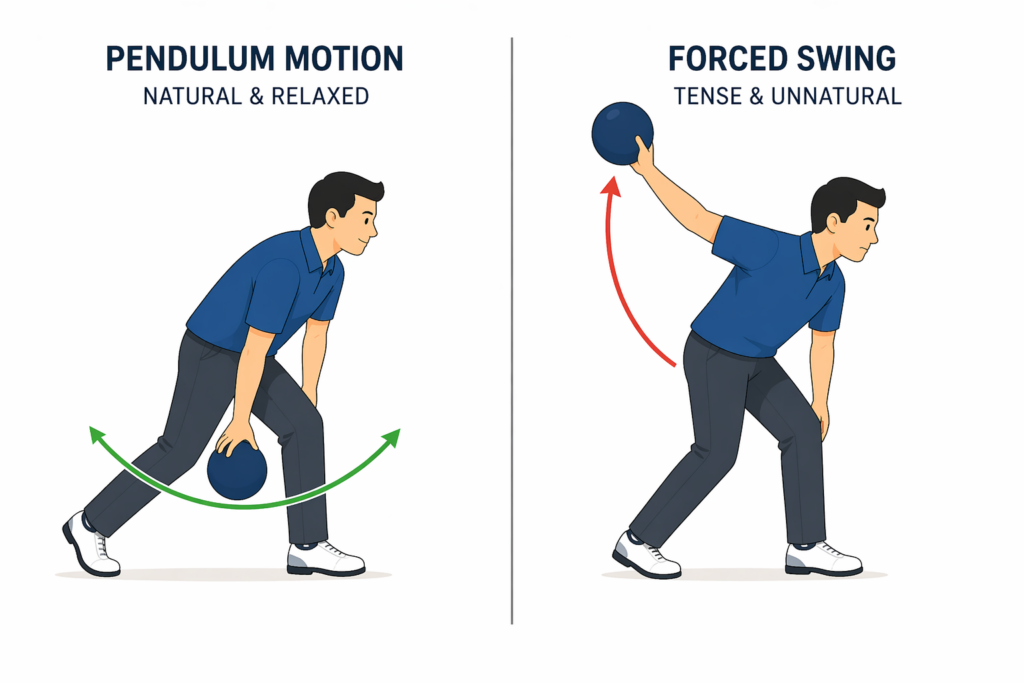
Once your approach has a basic structure, your swing and release become the next main levers. Think of your arm as a pendulum, not a catapult. The more you fight the weight of the ball, the harder it becomes to aim and control speed.
The pendulum concept (and why “muscling” doesn’t help)
Without a ball in your hand, let your arm hang loosely at your side and swing it a little bit forward and back. It feels light, natural, and consistent. This is the feeling you want to keep—even with a 14-pound ball in your grip.
If you find yourself lifting with your shoulder, curling your arm, or forcing the backswing higher, you’re “muscling” the shot. This often causes inconsistent ball speed and awkward timing, and it’s more tiring than it needs to be.
Controlling your backswing height
You do not need a backswing up near your head to bowl well. Many strong bowlers keep their backswing around shoulder height or slightly higher. What matters is that you can repeat it.
Ask yourself: if someone filmed your last ten shots, would your backswing height look similar each time? Fluctuating swings create fluctuating speeds, which means every shot feels a little different. A comfortable, moderate swing height that you can repeat is worth more than one or two “hero” swings that feel out of control.
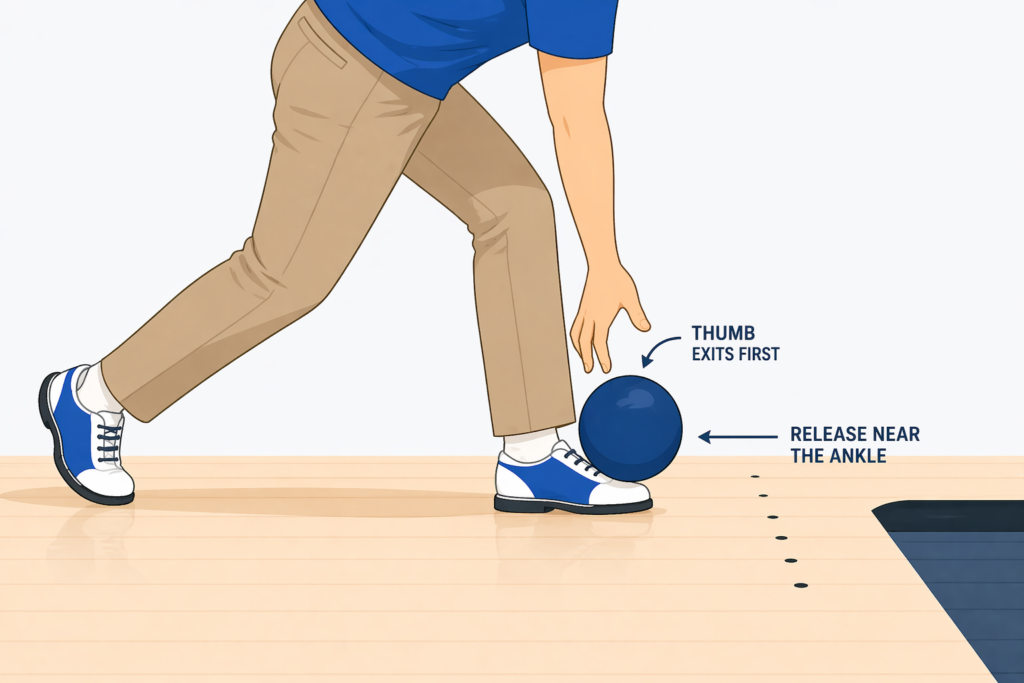
Basic straight-ball release mechanics
For beginners, the most useful skill is learning to roll a controlled straight ball. It might not look as flashy as a big hook, but it gives you a foundation for accuracy and spare shooting.
In your delivery:
Keep your hand mostly behind the ball as you swing forward, with your palm facing the pins or slightly upward.
Let your thumb exit the ball slightly before your fingers at the bottom of the swing, not halfway up your leg, not way behind you.
Allow the ball to roll off your fingers close to your sliding ankle. That low, close-to-the-floor release is what creates a smooth roll instead of a hard drop.
Your arm should continue naturally forward and up in a relaxed follow-through, roughly toward shoulder height, pointing toward your target. Don’t slam the brakes as soon as the ball leaves your hand; finishing the motion helps your brain groove a consistent path.
When and how to think about a hook
It’s easy to get impatient about throwing a hook because that’s what you see on TV and from experienced league bowlers. Hooking the ball does increase your strike potential by improving your entry angle into the pocket. But adding side rotation on top of shaky footwork and inconsistent releases tends to make everything worse, not better.
A more sustainable path is:
Get comfortable with your approach and timing.
Develop a reliable straight ball that hits the same target regularly.
Learn to pick up single-pin spares with that straight ball.
Then start experimenting with a mild hook.
When you’re ready to experiment, the basic idea is that instead of your hand staying entirely behind the ball, your fingers rotate slightly from behind to the side of the ball at release (for right-handers, around 4–5 o’clock position). Pair that with a reactive resin ball and some understanding of lane oil, and you’ll see a gentle curve develop.
Common release problems and quick course-corrections
Dropping the ball with a loud thud
Usually means an early release or a thumb that exits too soon. Check whether you’re squeezing the ball—if your grip is too tight, your thumb may drag. Focus on letting the ball fall naturally and hold onto it a fraction of a second longer, closer to your sliding ankle.
Lofting the ball halfway down the lane
Often comes from holding onto the ball too long or trying to “help” it with an upward lift. Try softening your grip pressure slightly, bending your sliding knee a bit more, and thinking “roll” rather than “throw.”
Unwanted sideways spin and wobbles
If your ball seems to corkscrew or wiggle, your hand may be turning too early in the downswing. Consciously keep your fingers behind the ball until you reach the bottom of the swing. Visualize bowling toward your target arrow instead of twisting the ball.
Aiming and Targeting the Lane
Most casual bowlers do exactly one thing when they aim: they look at the pins and throw. The problem is that the pins are 60 feet away. A tiny misalignment at the foul line turns into a big miss at the rack.
Learning to aim at closer targets—the arrows and boards—gives you feedback you can actually use and adjust.
Why you should aim at arrows, not at pins
The arrows are about 15 feet from the foul line. Your eyes are much better at focusing on a relatively close reference point than a distant one. When you aim at an arrow, you can start asking better questions after each shot:
Did the ball actually cross the arrow I was looking at?
If it missed, did it miss to the left or right of that mark?
Did it cross my target but still miss the pins? That might be a ball reaction or lane condition issue rather than pure accuracy.
For a right-handed beginner throwing a straight ball, a very common starting strategy is to stand near the middle of the approach and aim at the second arrow from the right. Left-handers often use the second arrow from the left. From there, you adjust based on where the ball ends up relative to the pocket.
Using the dots and boards under your feet
The approach dots line up with boards on the lane. This connection is your key to making controlled lane adjustments without guessing.
Pick a default starting board for your sliding foot—say, the center dot. If you notice your ball is consistently missing the pocket to the right, you can move your starting position one or two boards to the right while keeping your eyes on the same arrow. If you’re consistently missing left, move left.
This is a simple rule many coaches teach early on: “move your feet in the direction of your miss.” You don’t need huge movements. A board or two is often enough to turn a frustrating leave into a clean pocket hit.
Thinking in straight lines first, angles later
When you’re learning, imagine drawing a straight line from your release point on the lane, through your target arrow, and into the pins. Your job is to roll the ball along that imaginary line as consistently as possible.
As you start to add a bit of hook, that line becomes more of a curve. You’ll then aim a bit farther right (for right-handers) and expect the ball to arc back into the pocket. But even then, the same logic applies: pick a path, commit your eyes to it, and see where the ball actually travels compared to that plan.
Creating a simple targeting routine
A pre-shot routine isn’t about superstition; it’s about giving your brain a consistent checklist so you don’t rush. A basic routine might look like this:
Stand behind the approach, hold your ball, and decide where your sliding foot will start.
Trace the line in your mind from that spot to your chosen arrow, then to the pins.
Step onto the approach, set your feet on your usual board, and insert your fingers and thumb.
Take one calm breath, bring your eyes to your target arrow, and keep them there from start through release.
After the ball is gone, briefly note whether it crossed your chosen arrow. That’s your feedback loop, more than whether the pins all fell.
Practicing repeatable shots (even when you’re alone)
When you bowl alone or with a friend who doesn’t mind, dedicate entire frames to practicing one specific shot. For example, set your feet on your default board, aim at the same arrow, and throw five or six shots in a row that way, adjusting only if the ball keeps missing the same direction.
It might feel less “fun” than chasing strikes randomly, but this pattern-building is what turns your game from streaky to reliable. If your ball consistently crosses within a board of your target arrow, you will score better almost automatically.
Simple Bowling Strategy to Raise Your Scores
Once your stance, approach, swing, and aiming system are somewhat stable, you can start making small strategic decisions that pay off in the score column. You don’t need a book of oil pattern diagrams; just a few principles that you can actually apply while you’re keeping score.
Choosing control over speed
New bowlers often equate improvement with throwing harder. The problem is that accuracy is what keeps the ball in the pocket, and accuracy becomes much harder as you add speed without control.
If you often overthrow the ball, try intentionally reducing speed for a few frames. You may notice that pins still fall well, or even better, because the ball has time to drive through the rack instead of deflecting. A controlled shot that lands in the pocket beats a wild cannonball nine times out of ten.
Finding and trusting the pocket
For right-handers, the pocket is between the 1 and 3 pins; for left-handers, between 1 and 2. If you’re constantly slamming the head pin dead center (the 1-pin only) and leaving “washouts” or splits, your entry angle is too straight-on.
Try this: if you’re a right-hander hitting the head pin full and leaving ugly combinations, move your feet a couple of boards to the right and aim at the same arrow. You’re shifting your entire ball path slightly to the right so it hits the head pin a little off-center and drives through the 3-pin instead of deflecting across the lane.
Once you find a line that regularly puts you in the pocket—where you start seeing 9s and strikes more often—stick with it and pay attention to how it changes over the course of a set.
Lane conditions and basic adjustments
Lanes are not static surfaces. They’re oiled to protect the wood (or synthetic) and to shape ball motion. As you and other bowlers roll balls down the same path, the oil moves and breaks down, changing how your ball reacts.
For beginners, you don’t need to memorize named oil patterns. Just notice these two basic scenarios:
Your ball is hooking more over time
If you’re right-handed and your ball starts finishing farther left as the games go on, that usually means there’s less oil where you’re throwing—it’s hooking earlier. One simple fix: move your feet a board or two left, or move your eyes slightly right to find a little more oil.
Your ball is skidding and missing right
If it feels like the ball just doesn’t grab the lane and keeps going straight too long, you might be in a heavier oil track or throwing too far into the “slick” part. Try moving your feet slightly right or shifting your target a board or two toward the middle so the ball encounters more friction.
For a visual understanding of how lane oil works, our Learn page offers beginner-friendly diagrams and explanations.
Calming nerves and staying loose during games
It’s very normal to feel your body tighten when your score is higher than usual, or when friends are watching closely. Ironically, the more you “try” at that moment, the more likely you are to pull the ball, rush your steps, or over-grip.
Two simple habits help:
Use one slow exhale as you get into your stance. Half of the breath as you set your feet, the rest as you begin the approach.
Stick to your pre-shot routine regardless of the frame, whether you’re in the first frame or working on a turkey. Familiar steps calm your brain.
A practical pre-shot routine you can keep
Your exact routine can be short, but it should be consistent. One example that works for many bowlers:
Pick up your ball, wipe any visible oil off the surface with a microfiber towel.
Stand behind the approach and visualize the path from the foul line to your target arrow and into the pins.
Step onto the approach, set your feet on your chosen boards, and place your fingers and thumb.
Lift your eyes to your target arrow, take a calm breath, and begin your motion without second-guessing.
A Beginner-Friendly Spare Shooting System
If you’re serious about improving your average quickly, spare shooting is where most of your gains will come from. Strikes are great, but in real-world games—even for advanced bowlers—spares are what hold scores together.
Why spares change your average more than strikes
Imagine two players over ten frames:
Player A knocks down nine pins every frame but misses the spare every time: that’s 90.
Player B knocks down the same nine pins but converts every spare: that’s a game in the 170–190 range depending on a few bonuses.
Same number of first-ball hits, totally different outcomes. That’s the power of spare conversions. If you want to move from “occasional lucky high game” to “solid, reliable scores,” this is where you focus.
Using a straight ball on spares (even if you hook your strike ball)
Many advanced bowlers use one release for strikes and a straighter release for spares. The reason is simple: a straight ball is easier to aim. It’s less affected by changing lane conditions and small timing errors.
To throw straighter at spares:
Move your hand position so your palm faces the pins directly.
Keep your wrist firm and avoid rotating your fingers around the side.
Dial back your speed slightly so you can emphasize control.
You can use the same strike ball for this; you’re just changing your release to reduce spin.
A simple system for common single-pin spares
You can build an effective, beginner-level spare system using one central target board and moving your feet according to which pin you’re shooting.
For a right-handed bowler:
Pick a central target, often the middle arrow or a nearby board.
For a 10-pin (far right), move your feet left until a straight shot at your central target drives the ball into the 10-pin. The farther right the pin is from center, the farther left you stand.
For a 7-pin (far left), do the opposite: move your feet right while keeping your eyes on the same arrow.
Because you’re throwing a straight ball at these spares, this “move your feet, keep your eyes” system stays simple and repeatable.
Making corner pins (7 and 10) less intimidating
Most beginners dread the 7 and 10 pins because they feel like tiny targets in the far corners of the lane. But once you create a specific starting position and target for each, they stop feeling like guesses.
Pick one specific starting board for your sliding foot for the 10-pin (for example, just inside the leftmost approach dot). Find a board or arrow near the center that lines up your straight ball into the 10-pin. Practice that line repeatedly until it feels almost automatic.
Then do the mirror image for the 7-pin. By having “my 10-pin line” and “my 7-pin line,” you take a lot of the drama out of those spares.
Reading common spare leaves and what they tell you
Certain spare combinations are like notes from the pins about where your strike ball is hitting.
2–4–5 (for right-handers)
The ball is coming in light on the head pin and deflecting right. To convert this spare, line up like you would for the 2-pin and aim to hit fairly solid on it, letting the ball drive through the 4 and 5.
3–6–10
This often means your strike ball is hitting high and driving too much into the 3-pin zone. To pick it up, align for the 3-pin with a straight ball and let it catch the 6 and 10. Avoid trying to “curve” between pins at the beginner level; focus on picking off the key front pin with a good angle.
As you get more experienced, you’ll build more detailed spare systems (like the 3-6-9 spare system you’ll find discussed on sites such as Bowlers Journal). For now, learning the basics of “which pin to aim at” for the common leaves will put you ahead of most casual bowlers.
Practical spare drills during open bowling
When you’re practicing alone, resist the urge to reset frames after every first ball. Instead, intentionally shoot whatever spare leaves are there, even if there are only one or two pins standing.
You can also dedicate a full game to spare practice: aim slightly off the head pin on purpose to leave common single pins or small clusters and then practice converting them. Another useful exercise: spend a few frames pretending there’s always a 10-pin standing and roll your 10-pin line over and over until it feels ingrained.
Practice Plans to Improve Your Bowling Quickly
You don’t need to live in the bowling center to get better. What you do need is a bit of structure so practice turns into progress instead of just more games under your belt.
How often should you practice as a beginner?
A manageable target for most adults is one focused practice session per week. If you can go twice a week for your first month or two, you’ll often feel the skills settle more quickly. More isn’t always better, though—two hours of unfocused games will not beat one hour of intentional work.
Your body and brain need repetition, but they also need consistency. It’s the difference between casually bowling ten random games on a weekend and bowling three structured games every Wednesday for a month.
A simple one-hour practice template
Here’s a pattern you can repeat most times you go to the lanes:
Warm-up (10–15 minutes)
Bowl at an easy, comfortable pace. Let your body remember your stance, approach, and swing. Focus on smoothness and balance over score.
Skill focus (25–30 minutes)
Choose one or two specific skills for the day. Examples: hitting a particular arrow consistently, practicing single-pin spares, smoothing your release at the line, or stabilizing your timing. Throw multiple shots in a row from the same setup and pay attention to your ball path, not just the pins.
Game simulation (15–20 minutes)
Finish with one or two full games scored normally. Apply the skills you just worked on while also using your full pre-shot routine. Treat it like you would a league or social game—but with more awareness of your process.
Tracking your bowling progress intelligently
Bowling is a numbers game, but your final score doesn’t tell the whole story. Consider tracking a few simple stats alongside your score:
Your overall average over the past few weeks or months.
Your single-pin spare conversion rate (especially 7s and 10s).
How often your first ball hits the pocket when you intend it to.
There are many bowling score and stat apps available, or you can just jot notes in your phone. Over time, you’ll start to see patterns: maybe your spare conversion is improving while your pocket percentage is flat, or vice versa. That tells you what to focus on next.

Setting realistic short- and long-term goals
Good goals are specific and within your control. A few ideas:
Short-term (over a month or so):
Hit your chosen target arrow on at least half of your shots during a practice session.
Increase your single-pin spare conversion by a noticeable margin.
Bowl three consecutive games without a gutter ball.
Longer-term (over several months):
Reach and maintain a certain average—say 140, then 160, then 180.
Join and stick with a beginner or mixed league for an entire season.
Develop a controlled, small hook once your straight ball and spares feel solid.
“Roll a 300 game” sounds impressive, but it’s not useful as a beginner’s goal. “Hit my target arrow on 7 out of 10 shots” or “convert 70% of my single-pin spares” is much more actionable and ultimately more rewarding.
Bowling Etiquette and Safety for New Players
Bowling is usually low-pressure and social, which is part of its charm. But there are a few unwritten rules and basic safety habits that keep the environment comfortable and fair for everyone on the lanes around you.
Lane courtesy and right-of-way
The main etiquette rule in most bowling centers is about who goes first when neighboring bowlers are ready at the same time.
Standard practice is this: if you and the person on the lane directly to your right step up together, the bowler on the right has the right-of-way. Let them throw first. Once they’re off the approach, you go. This simple habit prevents distraction and awkward “no, you go” exchanges.
Similarly, try to avoid stepping onto the approach while someone beside you is mid-approach or release. Even if they say it doesn’t bother them, staying mindful here is part of respecting their focus.
Respecting the foul line and lane surface
The area beyond the foul line looks harmless, but it’s coated in lane oil. One step onto that surface with bowling shoes can send you sliding—hard. Stay completely behind the foul line for all celebrations, ball retrievals, and “that was so bad I want to walk it off” moments.
The approach is also not the place for drinks, food, or anything that might spill. A small slick spot where someone slides into their release can cause falls or injuries.
Handling equipment responsibly
Bowling balls and ball returns are durable, but not indestructible. Avoid slamming balls onto the return, dropping them from height, or intentionally lofting them from way back on the approach. That kind of impact is rough on the lane surface and on your joints.
If something seems wrong with the equipment (a stuck ball return, a pinsetter issues, a visible crack in a ball), let the desk staff know instead of trying to fix it yourself. Modern bowling machines are complex and can be dangerous when accessed improperly.
Staying physically safe between shots
After each shot, give your hand a second to dry before picking up the ball again. Wet or sweaty fingers stick in the holes more easily, and a stuck thumb at release can throw your body off balance.
If you start to feel unusual pain in your wrist, elbow, shoulder, or back, it’s wise to pause. Bowling should be physically tiring at times, but it shouldn’t feel like you’re injuring yourself to finish the game. Take a couple of frames off if necessary; there will always be more games to play.
Common Beginner Mistakes (and What to Do Instead)
Almost every bowler you see rolling effortless strikes today went through the same clumsy, trial-and-error phase you might be in now. The good news is that many beginner mistakes are very fixable once you recognize them.
Overthrowing the ball
Trying to “throw hard” is one of the quickest ways to ruin your timing and accuracy. Overthrowing usually shows up as loud impacts, off-balance finishes, or wild misses off target.
Instead, try to bowl at a speed that feels almost slow to you. Shorten your steps a bit, relax your hand, and focus on letting the ball swing freely. You’ll often discover that your pin carry actually improves.
Focusing on the pins instead of closer targets
Watching the pins feels natural, but it robs you of the chance to build consistent targeting. Without a closer aim point, it’s almost impossible to know what part of your motion needs adjusting.
Make a simple rule for yourself: every shot, pick an arrow or board and judge your success by whether the ball crosses that. Over time, your brain will start aiming your entire approach and swing toward that mark automatically.
Changing your starting position constantly
Some beginners move several boards left or right after every miss with no reference points. That kind of random adjusting makes it very hard to tell what worked and what didn’t.
Choose a default starting board on the approach, and only move one or two boards at a time when you need to adjust. Note in your head what you did: “moved two boards left and kept the same arrow.” That way, if it works, you can do it again on purpose.
Gripping the ball as if it might escape
An overly tight grip tenses your forearm and shoulder and often prevents your thumb from exiting cleanly. This is when you see lofting, pulling, or the ball staying stuck in your hand far too long.
Check your ball fit first. If you need to clench just to hold onto it, the holes might be the wrong size or span. Then practice standing in your stance and consciously relaxing your fingers and thumb so the ball rests more naturally in your hand. The ball should feel secure, not trapped.
Getting discouraged by rough frames or bad nights
Bowling scores fluctuate. Even experienced bowlers have games where nothing seems to carry and pin leaves feel unfair. If you judge your progress only by the score at the end of a single night, you’ll miss the bigger trend.
Instead, pay attention to the small wins: were your approaches smoother? Did you miss fewer easy spares? Did you hit your target arrow more often? Those are signs your game is actually moving in the right direction even if tonight’s score wasn’t what you hoped for.
When to Look for Coaching or Join a League
At a certain point, “just bowling more” stops producing the same jump in skill. That’s often when it makes sense to get a bit of outside input or join a structured league environment. Neither is reserved only for high-average players—both can be valuable even while you’re still learning.
How to know you’re ready for coaching
You might benefit from a lesson or two if:
Your average has stalled for a while, even though you bowl regularly.
You can feel that something in your approach or release is “off,” but you can’t quite see what.
You’re interested in learning a controlled hook, reading lane conditions more intentionally, or making smarter equipment choices.
A qualified coach sees your game from angles you can’t see yourself. They can often point out small adjustments—a drifting approach, early timing, inconsistent hand positions—that make an outsized difference.
Why joining a league helps even if you’re not “good yet”
Many people picture leagues as hyper-competitive environments full of experts. In reality, most bowling centers offer beginner-friendly and mixed-skill leagues where the focus is as much on social time as on scores.
When you bowl in a league, three things happen:
You bowl on a regular schedule, which naturally builds consistency.
You get used to bowling under mild pressure—keeping score, bowling “for your team”—in a supportive environment.
You’re around players who are just a bit better than you. Watching them and asking occasional questions becomes an informal form of coaching.
It’s common for a bowler’s average to climb significantly during their first league season simply because of this consistent, structured practice.
Choosing the right coach or instruction format
Good beginner coaching doesn’t feel overwhelming. A coach or program that’s a good fit for you will:
Explain concepts clearly without drowning you in terminology.
Focus on foundational skills—setup, approach, timing, targeting—before pushing advanced techniques.
Respect your personal goals, whether that’s “bowl 150 consistently” or “eventually compete in tournaments.”
Many centers offer introductory group clinics or “learn to bowl” programs which can be cheaper than private lessons and give you a built-in group of peers at a similar level.
Bringing Your Bowling Game Together
By this point, you’ve seen how many seemingly separate pieces actually connect: the ball you choose, the way you stand, how you walk, where you look, how the lane oil shifts under you, and what you do when you miss a strike. Improvement isn’t about mastering all of it at once. It’s about stacking one small, reliable habit on top of another.
On your very next visit to the lanes, you don’t need a total overhaul. Pick one or two core ideas from this guide and make them your focus. Maybe it’s keeping your swing relaxed and pendulum-like, or using the arrows instead of the pins for targeting, or taking spare shooting seriously for an entire session.
A simple checklist before you bowl can help keep things grounded:
Choose a ball weight that feels comfortable for several games, not just one frame.
Use a consistent starting board for your sliding foot and pay attention when you adjust.
Aim at a specific arrow and use it to judge each shot.
Let gravity handle most of the swing; avoid forcing the ball.
Throw a straight ball at single-pin spares using a simple “move your feet, keep your eyes” system.
Note your scores, but also note how many single-pin spares you converted and how often you hit the pocket.
If you give yourself a month of this kind of focused bowling—just a handful of sessions—you will almost certainly feel more in control of your game. Strikes will feel less like lucky accidents and more like the natural result of choices you understand: the ball you picked, the line you chose, the way you walked, and the timing you trusted.
Bowling becomes a lot more satisfying when you can see the cause-and-effect behind each frame. From there, it’s just repetition, curiosity, and a bit of patience. The pins at the end of the lane aren’t going anywhere; you’ll have plenty of chances to keep knocking them down, one well-planned shot at a time.