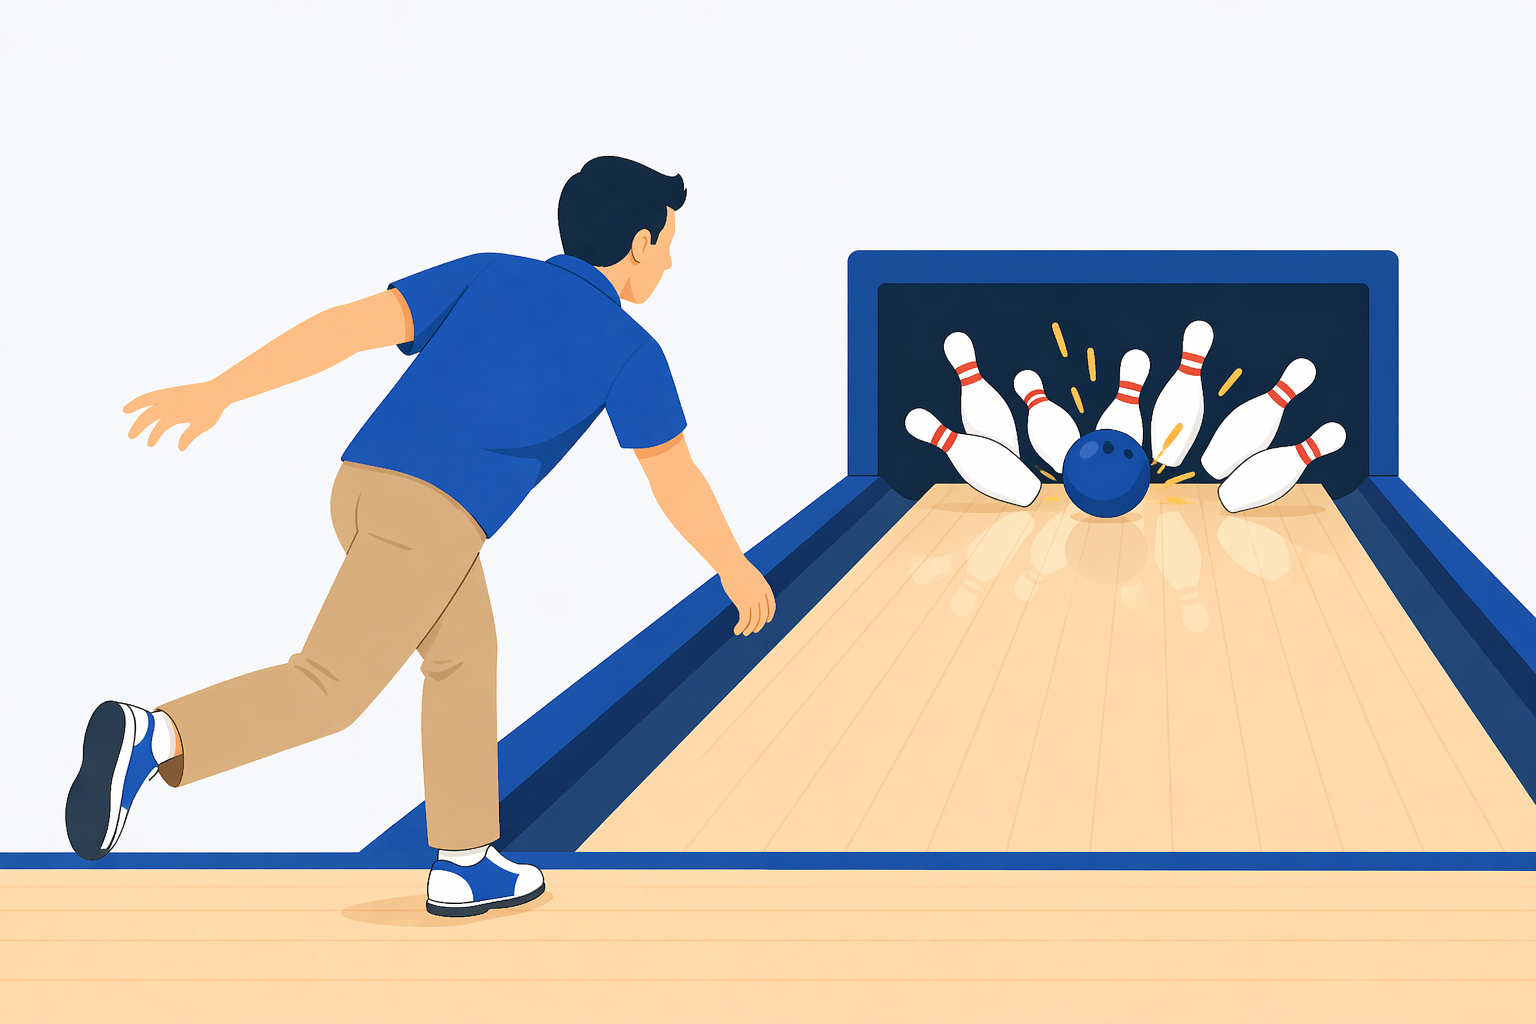
The truth is, every frame ends with a message sitting 60 feet away in white plastic. The way the pins stand, fall, slide, or topple late is not random. It’s a running report card on your line, your speed, your release, and how the lane is changing in front of you. Once you start reading those pin formations with intention, you stop guessing and start making informed decisions.
This guide is designed for bowlers in that in-between space: you’re not brand-new, you can hit the head pin on purpose, you’ve felt the rush of a string of strikes—but you also know you’re leaving too many easy spares and giving away games to splits and stubborn corner pins. You don’t need a tour-level hook or a truck full of bowling balls to get better. You do need a clear mental map of the pin setup, what different leaves mean, and a simple set of strategies you trust when it’s time to adjust.
What follows is a deep, practical look at bowling pin formations: how the standard rack is laid out, why the pocket works the way it does, what common leaves say about your shot, and how to handle spares and splits without panicking. Along the way, we’ll tie all of this to lane conditions, entry angle, and realistic practice habits so you can turn that knowledge into more 170–200+ games instead of “that one random 220” you talk about for weeks.
The 10‑Pin Rack: Layout, Numbering, and How to Picture It
If you want to read pin formations, you need the picture of the rack burned into your brain. Not just “a triangle of pins,” but which pin is which, how they relate to each other, and how your ball is supposed to move through them.
A standard ten-pin rack forms an equilateral triangle of four rows. Each pin is 4.75 inches in diameter, and the centers of the pins are spaced 12 inches apart. That spacing is what makes all the familiar combinations possible—from the lonely 10-pin to the infamous 7–10 split.
How the pins are numbered
From the bowler’s point of view, pins are numbered front to back, left to right:
Front row
The single pin front and center is the head pin, or 1-pin. Any traditional strike must involve it. Miss it entirely and you’re often looking at a washout or scattered spare that’s tougher than most splits.
Second row
Behind the head pin sit two pins:
2-pin: just behind and to the left of the head pin.
3-pin: just behind and to the right of the head pin.
On a textbook strike, the ball hits the head pin off-center, drives it into the 2 or 3, and starts the chain reaction.
Third row
Behind those you’ll find three pins:
4-pin: left side of the third row.
5-pin: dead center of the rack.
6-pin: right side of the third row.
The 5-pin, sitting right in the heart of the triangle, is the “how did that not strike?” pin. When it’s the only one standing, you usually threw a pretty good shot that just didn’t carry.
Back row
Finally, the back line holds four pins:
7-pin: far left corner.
8-pin: left-middle of the back row.
9-pin: right-middle of the back row.
10-pin: far right corner.
The 7 and 10 are the “corner pins.” They’re the ones that linger on many pocket hits and have probably cost you a few clean games.
Left side vs. right side: why it matters
If you mentally group the rack into a left side and a right side, a lot of your leaves start making sense.
The left side cluster includes pins 2, 4, 7, and often 8 as a support pin. The right side cluster includes pins 3, 6, 10, and often 9.
Right-handers usually attack the rack through the 1–3 pocket, sending energy primarily into the right cluster first. Left-handers mirror that with the 1–2 pocket and the left cluster. That angle, combined with ball speed and rotation, is why right-handers tend to be haunted by the 10-pin and left-handers by the 7-pin.
Key reference terms you’ll see again and again
As you think more intentionally about pin formations, a few terms become part of your normal vocabulary:
Head pin: the 1-pin. Missing it or clipping it too thin is often your loudest warning that your ball didn’t get where you intended.
Pocket: the small gap just off the head pin:
– Right-handers: between the 1 and 3 (1–3 pocket).
– Left-handers: between the 1 and 2 (1–2 pocket).
Light hit: your ball barely touches the pocket side of the head pin and side pin. It’s “on the edge” of the pocket. Often leads to weak corners, buckets, or mixers.
Heavy / high hit: the ball gets too far inside, closer to the non-pocket side of the head pin (for right-handers, the 1–2 side). This can cause the ball to drive through the rack too aggressively and leave big splits.
Deflection: how much your ball changes direction as it passes through the pins. Too much deflection (ball glancing away) leaves corners; too little (ball runs straight through) leaves big inside splits.
You don’t need to memorize every possible pin combination to start improving. What you do need is a mental snapshot of the rack and enough awareness to say, “I left the 2–4–5–8; that tells me something about where my ball just went.”
The Pocket: Why Strikes Happen (and Why They Don’t)
Power alone doesn’t create strikes. If it did, every 20‑mph cannonball down the middle would wipe the rack. Strikes come from the right entry angle, at the right speed, with the right amount of energy left in the ball as it gets to the pocket.
What the pocket actually does
For a right-hander, the pocket lives between the 1 and 3 pins. For a left-hander, it’s between the 1 and 2. In both cases, a true pocket shot hits the head pin just off-center and touches (or strongly influences) the side pin in that gap.
Why off-center? Because you want a controlled chain reaction, not a dead-on collision. A ball that hits the 1-pin too square dumps its energy straight back into the 5-pin and leaves lots of “how did that not strike?” moments. A ball that enters just off-center lets the head pin kick sideways, the ball continue through the middle of the rack, and the side pins create lateral motion across the back row.
How a textbook pocket strike falls
If we slow down a perfect pocket strike for a right-hander, the sequence looks roughly like this:
– The ball hits the 1-pin slightly on the right side, sending the head pin into the 2-pin.
– The ball continues into the 3-pin and 5-pin, then deflects toward the 9-pin zone.
– The 3-pin is driven into the 6, which then takes out the 10.
– The 2-pin is driven into the 4, which then takes out the 7.
– The 5 pin and ball together influence the 8 and 9, helping clean the back row.
For a left-hander, flip that entire description left/right. The geometry is the same; the path is mirrored.
When all of that happens with the right energy and angle, the rack disappears. When one link in that chain goes wrong—a pin slides instead of kicking, or the ball deflects too much or too little—you get your 10-pin, 7-pin, 8-pin, or 9-pin mysteries.
Straight ball vs. hook: why angle matters more than style
You can score well with a straight ball. You can also score well with a controlled hook. What matters most is how your ball enters the pocket.
Straight ball: Easier to control, especially for spares. But for strikes, a totally straight shot from the middle of the lane tends to hit the head pin too head-on, which hurts carry. If you roll straight, you can improve your strike percentage by playing a small angle from the outside instead of aiming dead center.
Hook ball: A ball that starts toward the outside and then curves back in creates a sharper entry angle into the pocket—often in the 4–6 degree range that the USBC coaching resources often reference. That angle lets the ball get behind the head pin just enough to drive through the 1–3–5–9 (right-hander) or 1–2–5–8 (left-hander) and take out corners more reliably.
The important point: a controlled, repeatable hook—even a small one—tends to create better pin carry because of that improved entry angle and deflection pattern.
Common pocket variations and what they leave
Not every pocket hit is created equal. Two shots can look similar from the approach but leave totally different pins. Learning to connect “this leave” with “that pocket miss” is where you really start to adjust like a league bowler.
Light pocket hits
The ball brushes the outside of the pocket instead of digging into it. For a right-hander, this means you’re catching the right edge of the 1 and the right side (or even outer edge) of the 3.
Typical leaves include:
– 10-pin (right-hander) or 7-pin (left-hander).
– 5-pin or 8-pin on especially weak hits.
– “Mixer” strikes where pins bounce around and fall late.
Repeated light hits usually mean your ball is skidding too long (too much oil, too much speed, or not enough rotation) or you’re playing a line that doesn’t get you deep enough into the pocket.
Heavy / high pocket hits
Now the ball gets a bit too far inside. For a right-hander, you’re catching more of the 1–2 side than the 1–3, or your ball is reading the lane too early and rolling out before the pins.
Common results:
– 4-pin (right-hander) or 6-pin (left-hander).
– 4–6 or 4–6–7–10 type splits if the ball plows through without enough deflection.
– 9-pin or 8-pin “stone” leaves when everything else vanishes.
Consistent heavy hits are often a sign the lane is breaking down, your ball is too strong for the condition, or you’ve over-moved to the inside.
Flat and weak hits
Sometimes the ball makes it to the pocket but looks like it has no life left—it just kind of falls off the end of the pattern and hits without authority. That’s a “flat” hit.
These leave a lot of corners (especially flat 10s for right-handers) and 5-pins. Often the ball is burning up too early (too much friction in the front) or you’ve taken too much hand out of the shot. Adjusting speed, surface, or line can bring energy back to the pins.
Reading First‑Ball Leaves: What Pin Formations Are Telling You
Every non-strike is a leave: the set of pins still standing after your first ball. It’s easy to label them all as “bad luck,” but over a game, a series, or a league season, your leaves reveal your habits. They’re a direct report on your entry angle, ball choice, and lane play.
Single-pin leaves and their stories
There’s a big difference between leaving a random 5-pin now and then and living in 10-pin land every game. Here’s what common single-pin leaves usually mean.
10-pin (for right-handers) and 7-pin (for left-handers)
This is the classic “I thought that was perfect” spare. When it happens once, you shrug. When it happens repeatedly, it’s feedback.
Frequent 10-pins for right-handers usually indicate:
– Entry angle that’s a touch too shallow.
– Excessive deflection (ball is pushed to the right across the rack).
– Ball skidding too long or not finishing strongly enough.
For left-handers, flip this for the 7-pin. You’re close—closer than you might feel—but your ball is exiting the pocket too far toward the gutter side.
Single head pin (1-pin)
Leaving only the 1-pin is surprisingly common for straighter bowlers. You’ve hit the head pin enough to knock down most of the front cluster, but your entry angle didn’t create the side-to-side motion you need.
Repeated 1-pins usually mean:
– You’re coming in too straight through the front of the rack.
– Your ball isn’t reading the lane early enough (too slick, too much speed).
– You’re off your intended breakpoint.
5, 8, and 9 pins
These are “good shot, tough carry” leaves—but they’re not always just bad luck.
5-pin: Often a slightly too direct hit where the ball drives through the head pin and 3/2 but doesn’t create enough lateral motion to take out the center cleanly.
8-pin (right-hander) / 9-pin (left-hander): These usually appear after a very strong pocket shot where the ball continues through the pins with minimal deflection. Ironically, you may have thrown one of your best shots of the night.
Occasional 8s and 9s are part of the sport. Patterns of them, though, can point to a ball that’s too strong for the condition or a line that has you “rolling out” too early.
Common multi‑pin leaves (that aren’t splits)
Not all ugly-looking formations are splits. Many are simply misaligned pocket attempts and tell you exactly how far off you are.
Near-pocket combinations
Formations such as:
– 2–4–5 (right-hander).
– 3–5–6 (right-hander).
– 1–2–4 (left-of-pocket hit).
– 1–3–6 (right-of-pocket hit).
These usually come from shots that nick the head pin but miss the pocket side by a board or two. The ball gets a piece of the front but doesn’t take its entire side of the rack efficiently.
Bucket leaves
The classic “bucket” looks like a small diamond on your side of the lane:
– Right-hander: 2–4–5–8.
– Left-hander: 3–5–6–9.
Buckets show up on light hits where your ball is outside your intended line and deflecting too much. The head pin is down, but you’ve left a mini version of the full rack on one side.
A consistent diet of buckets almost always means your ball is skidding too long, your breakpoint is too far right (for right-handers), or you’re under-rotating the ball relative to the oil pattern.
Using leaves as a quick diagnostic tool
If you want a simple approach during league or practice, you can think in terms of patterns:
Repeated corner pins: Shallow entry angle or too much deflection. Try moving your feet one or two boards inside and keeping the same target, or slightly decreasing speed.
Frequent buckets and washouts: The ball is not hooking early enough or strong enough. Move your feet and target in the direction of the miss (for a right-hander leaving 2–4–5–8, move left and closer to the oil line) or switch to a slightly stronger ball or surface.
Lots of high hits and 4/6 pins: The lane is hooking earlier than you think or your ball is too aggressive. Move your feet and eyes toward the dry (for right-handers, move left and look farther right), increase speed a touch, or use a weaker cover.
Random head-pin and chop leaves: That’s usually not a ball problem; it’s a repeatability issue. Footwork, timing, and release consistency are worth looking at. Recording your approach on video can uncover things you can’t feel in the moment.
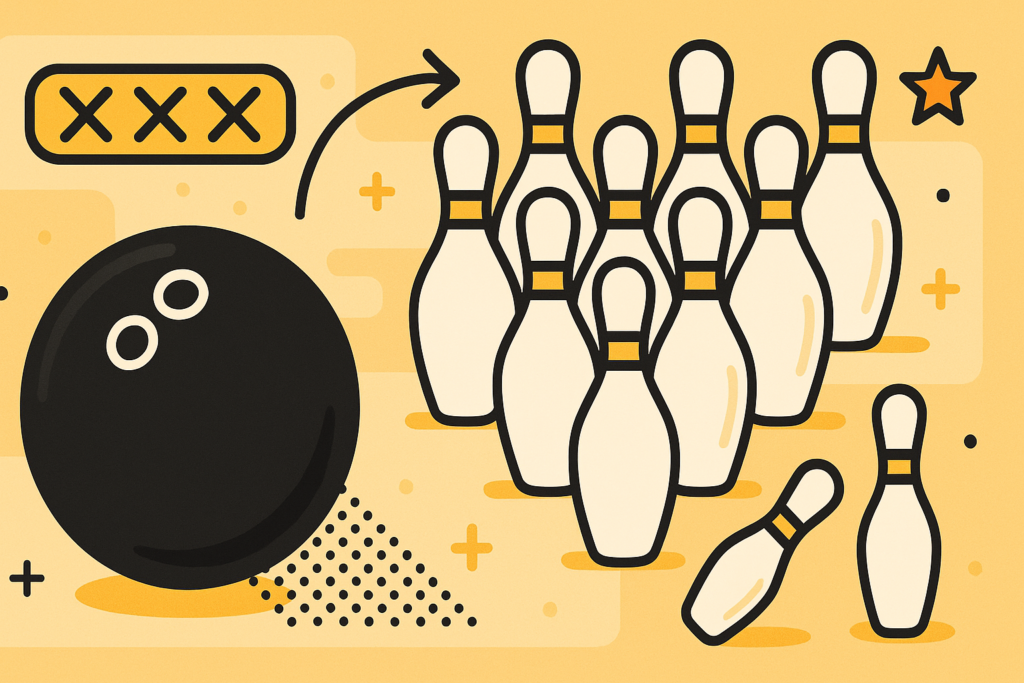
What Counts as a Split (and Why They Hurt So Much)
Splits feel personal. You throw what looked like a decent shot, the pins explode—and then you’re staring at two or more lonely survivors with a gulf between them. Understanding the official definition and the geometry behind splits makes them less mysterious and more manageable.
Official split definition
In ten-pin bowling, a split occurs when:
– Two or more pins remain standing after your first ball.
– The head pin (1-pin) is down.
– There is at least one vacant pin spot between the remaining pins where a pin originally stood.
That gap is what makes it a split: the helpful “in-between” pin is already gone, so you can’t just roll your ball at the cluster and expect chain reactions. You now need to use one standing pin to knock over another via sideways motion.
On traditional scoresheets, you’ll often see splits circled or marked to track difficulty. Modern scoring systems may flag them visually or keep a “splits converted” stat in the background.
Why splits are statistically brutal
From a scoring standpoint, splits are expensive. Many league bowlers convert routine single-pin spares above 80–90% of the time. But even very skilled players often convert difficult splits in the single-digit percentages.
That math adds up quickly. Three or four splits a night that you don’t convert can easily swing your game by 20–30 pins compared to a bowler who mostly leaves makeable spares instead of splits. Over a full season, that’s the difference between mid‑150s and pushing into the 180–190 range.
The underlying issue is simply geometry. Pins are 12 inches apart from center to center, and you’re often being asked to slide one pin sideways that entire distance. There isn’t much margin for error.
Common Splits: What They Look Like and What Causes Them
Not all splits are equal. Some are annoying but convertible if you know the angle. Others are, frankly, almost lottery tickets. Learning which is which helps you manage risk and read your shot.
Corner-pin nightmares: the 7–10 split
The 7–10 is the classic “goal posts” split: just the 7 and 10 pins remain, sitting at opposite corners of the back row.
It generally comes from one of three situations:
– An extremely light pocket hit where your head pin misses behind its partner and nothing reaches the opposite corner.
– A high-speed, low-rev shot that drives the head pin and middle of the rack straight back but doesn’t create side action.
– Over/under ball reaction on tough patterns, where the ball skids too long and then snaps too late, clipping only a narrow slice of the rack.
To convert it, you typically need to bounce one pin out of the pit or off the sidewall into the other. That’s heavily dependent on your center’s deck, sidewalls, and pinsetter design. Even on the PBA Tour, conversion rates are extremely low.
Baby splits: small gaps, realistic chances
“Baby splits” are narrower splits where the pins are separated by just one pin’s width. Examples include:
– 2–7 and 3–10.
– 4–5 and 5–6.
– 4–10 and 6–7.
They usually arise from slight pocket misses or half-pocket hits:
– A right-hander misses right and clips only the right side of the rack, leaving a 3–10.
– A left-hander misses left and leaves a 2–7 on the mirror side.
The good news: baby splits are very convertible with a straight ball and the right edge contact. You’re essentially using one pin as a messenger to take out the other.
Big inside splits: 4–6, 4–6–7–10, and friends
These are the punishment for heavy, high hits:
– 4–6.
– 4–6–7–10 (sometimes called a “big four” when only 4–6–7–10 remain).
– 6–7–10.
– 4–6–10.
The ball has cut through the head pin area and driven straight through the heart of the rack without deflecting enough. On house conditions, this often happens when you stay in one place while the lane is drying out and your strong ball picks up earlier and earlier.
Typical causes:
– Not moving left (for right-handers) as friction appears, causing the ball to hook too early.
– Using a ball with too much surface or too strong a cover on a medium or short pattern.
– Slowing down speed without moving your feet, effectively turning the same line into a high hit.
Back-row oddities: 7–9, 8–10, and similar leaves
Leaves like 7–9 or 8–10 look strange because they remove so much of the front and middle of the rack while leaving back-row partners.
They usually flow from odd deflections:
– The ball or a pin carves down the back row but misses one corner by a hair.
– The 5-pin slides in front of the 8 or 9 instead of into it, leaving its partner untouched.
These splits are tough to convert because there’s limited room to use one standing pin as a messenger while still covering both.
Bucket-type splits and the “Greek Church”
Sometimes a normal bucket leaves out key pins, turning a manageable spare into a genuine split.
For example:
– A partial 2–4–5–8 where one of those pins is missing but you still have a gap you must work around.
– A modified bucket on the right side that leaves, say, 3–5–8 with a gap in front.
The most notorious of these wide, uneven shapes is the Greek Church: typically the 4–6–7–9–10 for right-handers (and the mirror for left-handers). It looks like three pins on one side and two on the other, with empty real estate in the middle.
The Greek Church almost always comes from a severe high hit—your ball has dug into the head pin and the inside pins, then chewed through the core of the rack without enough lateral motion.
Connecting splits to your ball path
If you watch your leaves over time, you’ll start seeing patterns like:
– Big inside splits (4–6 types): too much hook, too strong a ball for the volume, or staying in one place while the front of the lane breaks down.
– Baby splits: slight directional misses, often indicating you’re a board or two off your mark or your ball reaction is inconsistent across the lane.
– Greek Church and similar: extreme high hits, over-adjusting inward on a hooking lane, or not changing balls when your current one starts up too early.
– 7–10: ultra-light hits and high speed, or over/under issues on tougher oil patterns.
Instead of treating each split as a standalone disaster, treat it as data. “I just left a 4–6–7–10. That’s not random; my ball is picking up too early and driving too hard through the middle.”
Foundations of Spare Shooting: The Real Engine Behind Higher Scores
Most bowlers love talking about their high games and their best strings of strikes. The quiet truth is that your average is far more driven by how you handle spares. You can throw a handful of strikes a game and still live in the 150s if you’re giving away open frames on simple leaves.
On the flip side, a bowler who hits the pocket often enough and cleans up almost every spare—even with only a moderate number of strikes—can live in the 180–200 range without a “huge” game in sight.
Why a spare system beats “eyeballing it”
When you walk onto the approach and wing your spare shot toward the pin, you’re depending on feel and luck. That works now and then; it doesn’t hold up over a full season.
Most serious bowlers use some variation of a system—like the 3–6–9 spare system or their own board-based map—so that each spare is approached with a specific plan: where to stand, what arrow to cross, how straight to throw it.
That doesn’t have to be complicated. It might look like, “For 10-pins I stand on board 35, aim at the third arrow, and throw it straight.” Once that’s dialed in, you’re no longer aiming at the pin; you’re executing a pattern.
Why many bowlers use a straight ball for spares
The lane changes during the night. Oil carries down, the track area breaks down, and your strike ball’s reaction shifts. Trying to “hook at” every spare means you’re also trying to mentally adjust for varying oil every single time.
That’s why many league and pro bowlers use a spare-specific ball—usually plastic or hardened urethane—that’s designed to go straight. It ignores most of the pattern, so your spare shots stay consistent.
Even if you only own one reactive ball, you can still do a lot to tame the hook on spares:
– Reduce your axis rotation (come more up the back of the ball).
– Add a touch of speed.
– Move into the oil line, so there’s less friction.
Resources like the Bowlers Journal articles on spare shooting often stress the same idea: straight is simple, and simple is repeatable.
Single-pin spare strategy
If there’s one area where you can quickly add 10–20 pins to your average, it’s your one-pin spare percentage.
Corner pins: 7 and 10
These are missed more often than they should be, mostly because hook bowlers try to “baby” their normal strike shot instead of treating these as separate tasks.
For a right-hander shooting the 10-pin, a common approach is:
– Move to the far left side of the approach (often around board 35–40, depending on the house).
– Aim at a board near the middle or right of the lane (e.g., the third arrow).
– Throw the ball straight with low rotation.
The mirror applies for a left-hander shooting the 7-pin.
Middle pins: 5, 8, and 9
5-pin: Many bowlers joke about the 5-pin being the “embarrassment pin” because it looks like the alley’s easiest shot and everyone is watching. Technically, it’s one of the simpler spares: stand near your strike position, square up to the head pin, and roll the ball straight down the lane.
8-pin (right-hander) / 9-pin (left-hander): These tend to be pocket leftovers. Often you just need a tiny move from your strike starting point—perhaps a board or two—and a slightly straighter release.
Basic adjustments by handedness
Everything is mirrored by which hand you use, but a useful mental model is:
– Right-handers: for right-side spares (6, 10) move left and aim right; for left-side spares (4, 7) move right and aim left.
– Left-handers: reverse all of that.
Over time, you can build your own “spare map”—a small list you keep in your bag or in your head: “For the 4-pin I stand here and hit this arrow, for the 7-pin I stand there and hit that arrow,” and so on. Once you settle on these landmarks, your brain has less to solve at the moment you most need composure.
Smart Split Conversion: When to Go for It and How
Splits will always be low-percentage shots compared to routine spares. That doesn’t mean you give up on them, but it does mean you stay honest about what’s likely and what’s reckless.
Core principles when shooting splits
Think “pin to pin,” not “ball to pin.” Your ball’s job is usually to hit one pin at an angle so that pin travels into another. You’re rarely trying to use the ball to strike both directly.
Use the inside edge when possible. For most two-pin splits, you want to hit the inside edge of the pin that’s closer to you, letting it slide sideways into the rear pin while the ball continues through.
Consider count, not just conversion. On really low-probability splits, you’re often better served by making sure you knock down the majority of the pins instead of gambling and possibly only hitting one. That “extra” pin of count can swing close games.
Approach to baby splits like 2–7 or 3–10
Let’s take the 2–7 as a right-hander (left-handers can mirror with the 3–10).
Your goal is to:
– Use a relatively straight ball.
– Hit the left side of the 2-pin just enough that it slides toward the 7 while the ball carries the 2.
Miss too thin and the 2 slides past the 7. Hit too full and you take the 2 straight back and leave the 7 untouched. It sounds picky, but with practice, that angle becomes just another shot in your toolbox.
Handling brutal splits: 4–6, 4–6–7–10, and Greek Church
Some splits are so low-percentage that your strategy shifts to “maximize count, minimize damage.”
4–6 and 4–6–7–10
On a bare 4–6, the theoretical play is to hit the inside of the 4 or 6 so it shoots across to the other. The window for this is tiny, and most bowlers convert these by accident when they’re trying something else.
On a 4–6–7–10, you can aim to clip one of the inner pins (say, the 6) on its inside, hoping it takes out the 4 while something ricochets into the 7 or 10. But in a league situation, trying to at least get three pins instead of two often makes more sense over the long term.
7–10 split
The typical realistic plan is simple: pick a side, aim a firm straight ball at the inside part of the 7 or 10, and hope the pin jumps out of the pit into its partner. It’s more art than science and highly dependent on pinsetter and backboard behavior.
Greek Church (4–6–7–9–10)
For this, many bowlers aim to take out the three-pin cluster on one side (for a right-hander, the 4–7–9) by hitting the outer pin at an angle that sends something toward the other side. If you happen to kick a pin across, great. If not, you should still leave with a higher count than if you gambled and barely clipped one pin.
Ball choice and lane reading for splits
Because split shooting is all about precision, a straight or predictable ball is easier to manage. Many bowlers switch to their spare ball for baby splits and most complex splits.
On very dry lanes, you might need to add speed on split attempts so the ball doesn’t hook past your intended angle. On heavy oil, you may need to square up more to keep the ball from skidding away from the pin you’re trying to clip.
Interpreting Pin Action: Using Formations as Feedback
One of the biggest shifts that happens when you move from casual bowler to consistent league bowler is this: you stop judging shots only by whether they strike, and you start judging them by how the pins fall and what’s left.
Common recurring patterns and what to tweak
Lots of corner pins
If your score sheet is full of frames that read “9/spare” with mainly 10-pins (for right-handers) or 7-pins (for left-handers), you’re doing more right than wrong. You’re in the pocket. But your entry angle or energy retention could be better.
Possible adjustments:
– Move your feet a board or two inside and keep the same target. This changes your angle through the front of the lane, sometimes getting the ball deeper into the pocket.
– Gently reduce speed so the ball has more time to read the friction and finish.
– Switch to a ball that stores more energy (shinier cover, weaker core) if your current one is burning up early.
Frequent buckets and washouts
A washout is a split where the head pin is still standing but you’ve removed part of the supporting cluster behind and/or to the side. For a right-hander, a common example is 1–2–4–10.
When buckets and washouts start appearing, it often means:
– Your ball is skidding too far before it starts to hook.
– You’re playing too far outside into the dry, and the ball is jumping erratically.
– The pattern has carrydown, making your ball push through the breakpoint.
Slowing down a touch, moving in to find more oil, or using a ball with a stronger cover can help the ball read the mid-lane sooner and avoid these leaves.
Head-pin and “chop” problems
Leaving only the head pin or chopping spares (e.g., hitting the 2 and leaving the 4, or hitting the 3 and leaving the 6) points toward alignment and consistency more than equipment.
It usually means your release, timing, or approach target is drifting. This is where recording video and comparing “good shots” to “chop shots” can show you small differences in footwork or pushaway that you never felt.
Adjusting line, speed, and hand position based on what you see
Bowlers often talk about “moving a board” or “moving their eyes.” The basic idea is:
– If you’re missing the head pin to the right (right-hander), move your feet and target to the right to square up more to the pocket.
– If you’re repeatedly high, move your feet toward the direction the ball is hooking (for right-handers, move left) and/or look a little farther right at the arrows.
Speed and rotation give you a separate dial to adjust. If the ball is hooking too early and hitting heavy:
– Add a bit of speed.
– Move your feet into the oil line.
– Keep your hand more up the back of the ball to reduce side rotation.
If the ball is skidding and not finishing (buckets/light corners):
– Soften speed slightly.
– Move your feet toward the dry (for right-handers, a small move right).
– Add a touch more axis rotation.
USBC’s ball motion explanations break this down in more technical language, but in practice, you’ll develop a feel for it by pairing “what I saw at the pins” with “what I changed next frame.”
Lane Conditions and Oil Patterns: Why the Same Shot Doesn’t Always Work
Every bowler has lived this scenario: Game one feels great, the ball is ripping the pocket, your carry is comfortable. By game three, those same shots start going high, or your ball suddenly skids past the breakpoint. The pins are just reacting differently.
That’s not mood or bad luck—that’s the lane changing underneath you.
How oil shapes ball motion and pin formations
Modern lanes are coated with oil to protect the surface and to design a specific ball reaction. Oil reduces friction; dry boards increase it.
On a common “house shot,” there’s a lot of oil in the middle of the lane and less on the outside. That creates a “wall” or funnel effect. Miss a little right, the dry brings the ball back. Miss a little left, the oil holds it. That’s why many house bowlers can miss by a couple boards and still hit the pocket.
As you and everyone else bowl, two things happen:
– The ball removes oil in the front part of the lane where it first touches, leading to breakdown (more friction, earlier hook).
– Some of that oil is carried farther down the lane, creating carrydown (more skid, later hook).
Those changes show up in your pin action long before you consciously notice the pattern shifting.
House shot vs. sport shot: how pin formations differ
On a forgiving house shot, you’ll see:
– Many pocket hits, even on slight misses.
– Lots of corner pins when you’re just a bit light or heavy.
– Buckets when the ball starts skidding more due to carrydown.
On a sport shot or tougher pattern (used in many tournaments and higher-level leagues), the oil ratio is more even across the lane. Miss a little left or right, and the ball doesn’t get saved by a built-in bumper of friction.
On these patterns, pin formations are often more extreme:
– More splits on small misses.
– Washouts when the ball skids past an intended breakpoint.
– Sudden high hits if you move wrong into the dry.
USBC’s lane pattern library, available through their championship pattern pages, is a useful resource if you want to see how different patterns are built and why they feel so different.
Adjusting as the night goes on
When your shot that was working in practice or game one starts leaving different formations, ask what changed, not “what’s wrong with me.”
Early hook / going high: If you’re suddenly leaving 4-pins, 6-pins, or 4–6 splits, the front part of the lane may be breaking down. The ball is grabbing earlier, burning energy, and rolling up too soon.
Adjustments might be:
– Move your feet a few boards left (for right-handers) and move your target slightly inside.
– Switch to a smoother or weaker ball that doesn’t read the friction as violently.
– Add a touch of speed.
Skid / late hook / weak pocket hits: If you’re leaving buckets, 2–8 or 3–9 combinations, or flat corners, your ball may be skidding through carrydown and not turning up in time.
Adjustments might be:
– Move your feet right (for right-handers) and find more friction.
– Slow down slightly.
– Switch to a ball with more surface or a stronger core.
Basic equipment choices and how they affect pin setups
You don’t need a massive arsenal, but having at least two different reactions in your bag gives you options when pin formations start telling you the lane has changed.
Common baseline setup:
– Reactive resin strike ball: Your primary hook ball for creating a strong entry angle and good carry.
– Plastic or urethane spare ball: For straight spare shots, splits, and tricky conditions.
If you’re shopping for your first or next ball, sites like Storm’s ball lineup or BowlingBall.com’s guides can help you understand how different coverstocks and cores change ball motion—and ultimately, pin action.
Practice Routines That Actually Change Your Pin Formations
Throwing game after game and hoping your scores climb is a bit like going to the gym and only maxing out your bench press: it’s exercise, but it doesn’t systematically develop your skills.
If you want your pin leaves to change—fewer splits, more makeable spares, better carry—you need practice that targets specific parts of your game.
Pocket accuracy sessions
Set yourself a simple rule for a few practice games: every first ball is judged on one thing—did it hit the pocket? Not, “Did it strike?” Just: “Was that a legitimate pocket shot?”
Track your pocket percentage for the game. If you throw 20 first balls and 14 are in the pocket, that’s 70%. Over time, try to raise that number. The more often you’re in the pocket, the more useful your pin formations become as subtle feedback rather than all-or-nothing disasters.
Dedicated spare games
Set aside entire games for spares. A few ideas:
– Pretend every frame starts with a leave of a 10-pin (for right-handers) or 7-pin (for left-handers). Walk through your full corner-pin routine every time.
– Bowl games where your “score” is just how many 7s and 10s you can convert, regardless of what the first ball actually did.
– Focus games on common multi-pin leaves like 2–4–5, 3–5–6, or buckets—even if you have to imagine them and align your shot where they would be.
If your center allows re-spotting pins, you can ask during quieter hours to set up specific spare and split formations. That kind of targeted work is much more valuable than mindlessly throwing full games.
Split practice with realistic goals
You don’t need to become a split magician, but it’s helpful to get some reps on baby splits and a couple of the more common big ones. The goal isn’t to convert them all; it’s to:
– Learn what “hitting the inside edge” really feels like.
– See how your ball reacts off different pins.
– Get comfortable taking high-count options on ugly splits instead of panicking.
Even 10–15 deliberate attempts at a 2–7 or 3–10 can transform those from dreaded events into “shots I’ve seen before.”
Tracking your progress beyond the score
As you work on this, it helps to look at numbers other than just your average:
– Single-pin spare percentage: Especially on corner pins and the 5-pin. Apps like LeagueSecretary.com or your center’s scoring system can help you monitor this over time.
– Split conversion rate: It will always be low, but if it moves from 3% to 8%, you’ll feel that difference in your scores.
– Pocket hit percentage: How many first balls per game are truly in the pocket, not just “near the head pin.”
Pair these stats with notes—mental or written—about the types of pin leaves you’re seeing. Over a month or two, you’ll start realizing you’re leaving fewer disaster formations and more makeable ones. That’s when your average tends to quietly climb.
Bringing It All Together on League Night
When you walk into the bowling center for league or a casual night out, none of this is meant to turn you into a human calculator. The goal is almost the opposite: understand pin formations well enough that you don’t have to overthink them.
Instead of muttering “bad luck” or “I can’t buy a strike today,” you start noticing:
– “I’ve left three 10-pins in four frames—my ball is deflecting. I’ll move a board left and slow it down a hair.”
– “That 4–6–7–10 wasn’t random; the lane is hooking early. Time to move in or switch balls.”
– “I’m seeing a lot of buckets—carrydown is here. I need a stronger look downlane.”
As you stitch together this awareness with a simple spare system and a pocket-focused mindset, your scores start to feel less like a roller coaster and more like a gently rising curve. You’ll still leave the occasional ugly split or watch a stone 9-pin stand in disbelief. That’s bowling. But you’ll know why it happened, and you’ll know what to try next.
And that’s where the real confidence comes from: not from hoping every shot strikes, but from understanding what every rack of pins is trying to tell you—and having a plan for how to answer back.